Bluddtoof here with an update on my recent work on some Assault Terminators and a couple of character models. All these models were originally painted a few years ago but I'd only given them a basic paint job on the weapons. I painted up the Captain and tried a lightning effect on his hammers to represent the power field.
Recently I was preparing for a big apoc game and decided I wnted to run all my termies, so I decided to update the ir weapons to be like the captains, at the same time I needed to rearm my Chaplain who was previously armed based on a much older codex version, so he got a new shiny Crozius and a combi flamer, all the better for purging the Heretic!
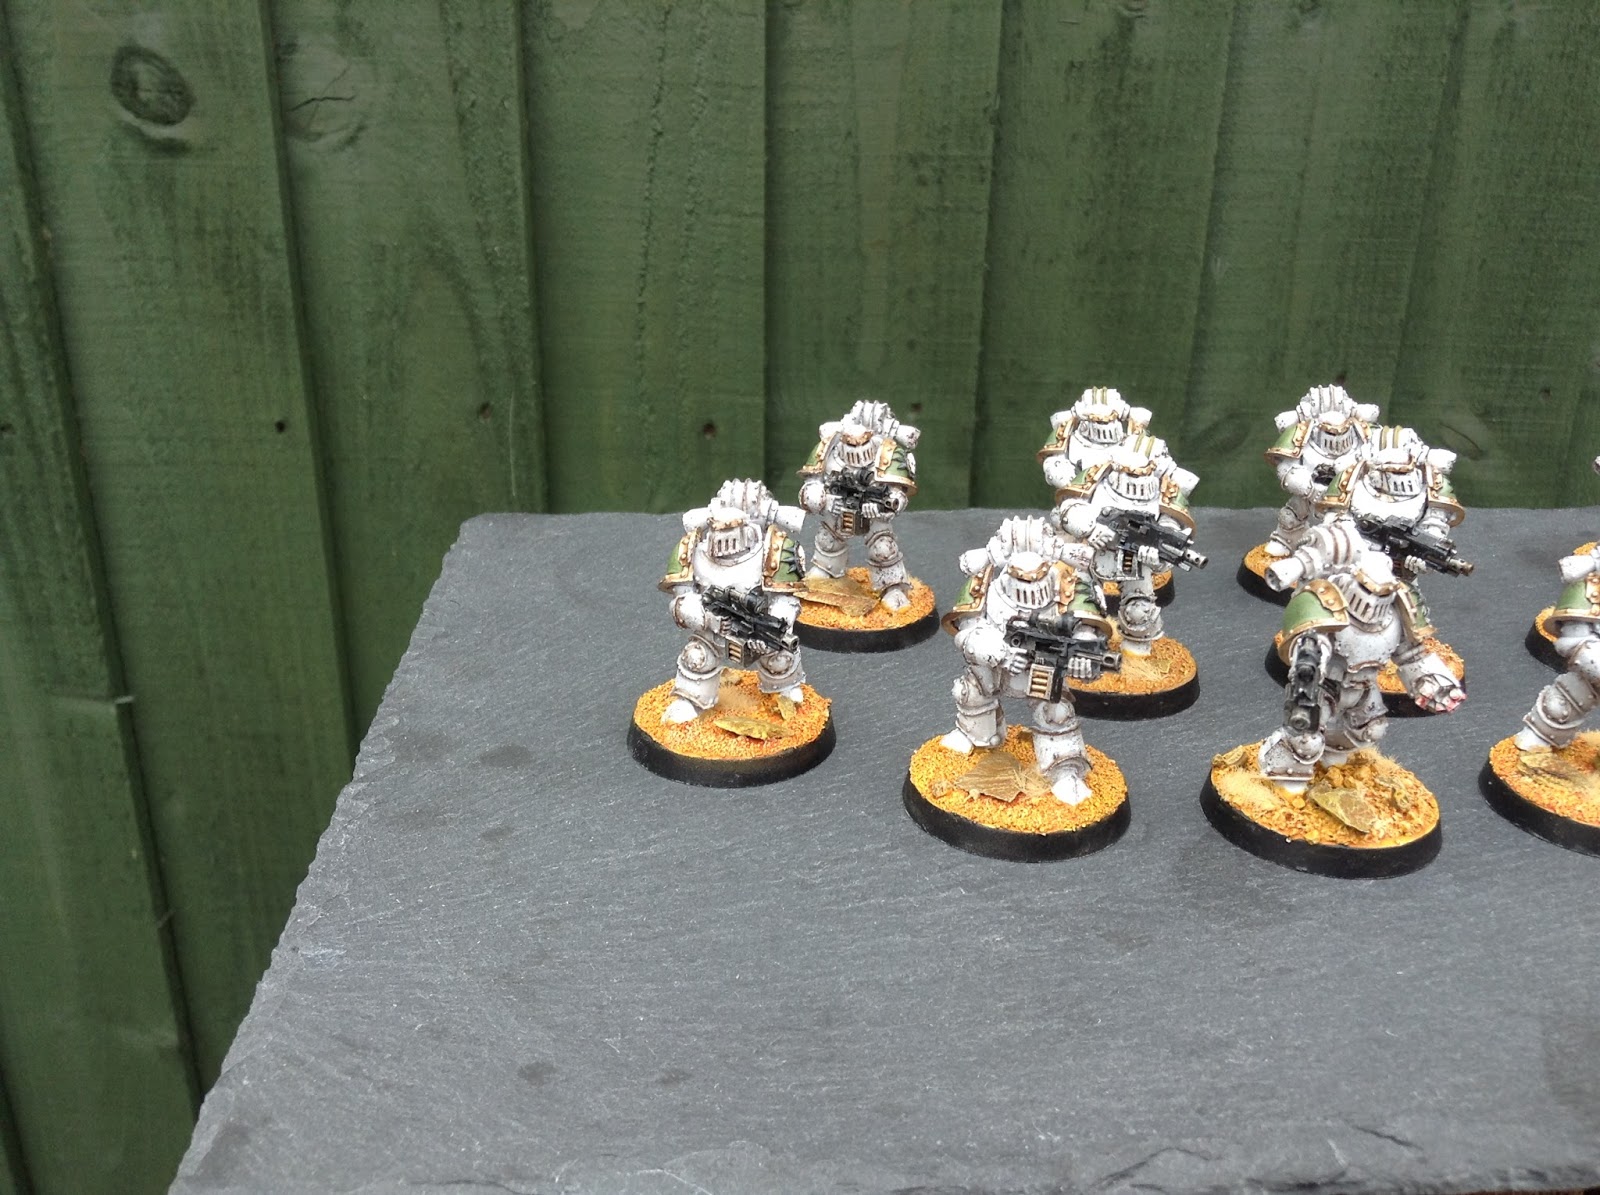
Some pics...
..of the newly re-armed 1st company assault squads.
At some point in the hopefully not too distant future I will be re-basing the entire marine army to be more inline with my Imperial Knights, for posts on them see here , here , here , also here , here , this too , and this , this , this as well as here , here and finally (or initially) here
Next job is my Typhon, and a vindicator which I will be painting using my new airbrush, so some practice is ongoing with this new tool.
Ok so those who follow the blog will know I have been really toying with Heresy Death Guard for quite a long time. Something along the lines of two years. In that time since I started the project has changed significantly. It started off as a 40k/30k army, the paint scheme was originally by hand and now the scheme involves a lot of airbrushing. So yes its changed.
As part of the ever changing process and to come to a final decision I have now modified the bases as well. I have been using the brown design for so long and on 4 other armies so I needed a change. With this in mind the first thing I did was experiment a lot as illustrated by the pictures below:
These were all deemed failure in the end although I quite liked the high contrast red finish. In the end I plumped for the base design you will see showcased on my first legion tactical squad below.
This tactical squad completes my first Hobby Season completion. I am so happy with the finish and base contrast and hope this is the end of changing my mind and means I can push forward on getting units finished up.
So first project is complete:
As always comments are welcome. If the interest is there I will be happy to describe my process for painting these dudes up.
Something a little new for you all this time, The sons of Magnus the Red :)
Had a request from a client to attack a small force of Thousand Sons marines for 30k and the FW colour scheme was mentioned so I decided to have a crack at it and see how it went.
I did a little digging online and found (from the Dakka Website if memory serves?) that somebody had emailed Forgeworld and asked them how they achieve the shiny red of their Thousand Sons and they provided the recipe!
It's probably worth pointing out at this point that the bulk of the red was done with an airbrush although I see no reason the scheme couldn't be replicated with a standard brush.
Firstly the model was coated in Lead Beltcher base metallic.
Then only spraying from above, the model was highlighted with Runefang Silver to highlight.
Then the fun bit....
Using 4 good, thin coats, the model was airbrushed with Forgeworlds Angron Red Clear Paint. This took a while as it was important to let the model dry after each layer so ideally doing these in bulk would be prudent.
Once a good shade has been acquired, use Nuln Oil in the recesses to give a little depth to the colour.
Once that's dried, using a good sharp brush, edge highlight the red with Runefang Steel to really make those for edges snap.
Once the red was complete, I began to pick out the detailing in Brass Scorpion (Honestly one of my favourite paints, it just covers so well and works fantastically as a base for gold or silver builds). After the Brass I built up the golds using another 2 or 3 different GW shades until I was happy with the look.
Then it was simply a case of picking bits I fancied and finishing them before moving onto the next part.
My style of painting has changed a little of late, I used to favour getting all the base colours done on a model before going back and bringing the detail out but more recently I've changed my approach to starting and finishing specific parts of a model before attacking the next. This works better on high level character models etc instead of batch painting line minis but allows me to keep interested as I play, both starting something and finishing it in a session is incredibly rewarding.
Any way - that's about the jist of how I tackled the Traitor Librarian, I'll leave you with some pics of the finished mini. I haven't enjoyed painting a model as much as this in a long time :)
Thanks for reading and if you've any questions please shout them up in the comments!
Bluddtoof here, finally I've got round to finishing off the weathering on my Freeblade Knight Errant. It's only taken me 2 years!
So I was really quite nervous about this little project; the knight is probably my best work to date, I was very concerned I'd mess up the finish with poorly done weathering, I'm not experienced at all with weathering.
I'd done quite a bit of research on different methods and materials over the last year or so, a lot of advice came from my code40k colleagues, a big shout out to the boys for the help!
I bought a winter effects kit a while back that has quite good instructions included, Scene- A-Rama is the brand, and I experimented a bit with the various materials with mixed results.
The "snow base" liquid makes an excellent base layer for applying snow in the form of flock or powder, the snow powder in the kit is made of crystals of varying sizes all mixed up, I used it in conjunction with GW snow flock and Bicarb, applied in different layers for the final finish. This came after a great deal of playing around. Some of it I then coated in the "Ice Effects" liquid, a thickish clear resin that sets real quick.
All of this worked ok and was pretty easy after I'd worked out the method.
The tricky bit was Icicles, I knew I wanted the knight to be crusted with icicles hanging from the shoulder guards and carapace to simulate it having stood sentry for ages in sub zero temperatures and now just awoken to the call to arms. The kit has instructions to use the ice resin to make icicles...... it doesn't work, I tried and tried and tried, the resin just spreads and makes an icicle shaped flat sheet.... no good for the application I wanted..... so.... Luko Dakka delivered the solution with a quick explanation of how he used melted flying stems.....some practice later..... and Icicles I'm really pleased with! Hurrah! A word of warning tho if you try the melting plastic method...open a window and wear a face mask, nasty fumes.
In case you've not tried it here's my method I used....
Over a tea candle, hold a flying stem at both ends with a pair of needle nosed pliers in each hand. Hold the stem about 10-20mm above the flame, too close and it will scorch and even ignite...that was an interesting minute or so! Too high and you'll be waiting a LONG time. Keep a close eye on the surface of the plastic, it will start to develop fine striations and very shortly it will sag visibly.. Immediately apply a little tension and REMOVE from the heat, keep the gentle tension applied and the stem should quickly stretch very thin, keep pulling gently and the plastic should keep stretching with the thick end bits slowly feeding into the thin middle bit, you'll feel the resistance increase gradually, keep applying gentle tension until it won't stretch any more. You should now be able to let go and you'll have a long piece of plastic with a really thin middle section flaring out at both ends to fat bits. Chop this in the middle and cut/shape the fat ends to create the bit that connects to the surface the icicle will hang from, 2 icicles from 1 bit. You can then go on to do the same with the chopped of ends too if they're big enough.
This took me a few attempts to get right, it's very much a matter of FEEL with each piece, if you pull too fast it'll snap and then curl up.....ruined! Pull too little it'll just sag, too long over the heat...sag, burn, mess! Thankfully clear plastic flyer stems are cheap and plentiful, you generally get extras with any skimmer model.
One thing I did find tho was that once you've melted a piece and let it set again it doesn't melt cleanly ever again, I'm sure a chemist could explain it!
Anyhoo, enough blather! Piccies....
As you can see I haven't applied a huge amout of snow on it, I didn't want to obscure the paint job too much but I wanted it to look like it had recently had snow fall which has been dislodged as it starts to move.
Hope you like it, I do, I'm very pleased with the finish and I'm looking forward to rest of my Knights and trying different winter effects methods on them.
As ever C&C welcome....
For years I have followed Dave's from confession of the 40k addicts progress using his hobby season format. It has seemed to be a nice motivational tool. So when Dave a couple of weeks back put a shout to see if anyone would like to join him for the next season starting I thought yep I am in for this! Extra motivation tools cant be a bad thing right? So what is a hobby season guess you are asking?
Well its simple and the best thing in a hobbyist arsenal a list! A list of projects you would like to complete in the next 12 months. Dave has also kindly made some icons or stamps to go along with the hobby season.
Ok along with the stamp above Dave has made some cool completed stamps which I attend to use. They are split down into major and minor hobby list stamps. First up is the major stamp followed by my list of major projects for the next 12 months.
Major Projects 2016/17
Mortarion Primarch of the Death Guard
Spartan Assault Tank
Knight Cerastus Lancer
Cerebus Tank
New Desert Themed Board
Deadzone Board (not 40k thats ok right!)
Leman Russ Primarch of the Space Wolves
Imperial Navy Avenger Strike Fighter
Necron Teseract Ark
MDF Necromunda Terrain
Re paint baneblade
Ok so there are 3 major scenery projects on here which is typical of me! I love scenery so not surprised by this. I will be surprised if I finish all 3! This is 11 major projects but its a list right (dare to dream!).
Minor Projects 2016/17 (this could go on for a while!)
2 X Chimeras
1 X Taurox
1 X Valkyrie
2 X 19th Dicer Psykers
1 X Colonel 19th Dicers
4 X Repaint of Leman Russ Tanks
5 X Enforcer Pathfinders
1 X Enforcer Strider
5 X Enforcer Peacekeepers
10 X Volkite Death Guard
2 X Rhinos Death Guard
3 X Medusa's Death Guard
30 X Tactical Legion Death Guard
10 X Assault Marines Death Guard
10 X Deathshrouds Death Guard
6 X Jetbikes Death Guard
3 X Drop Pods Space Wolves
3 X Thunderwolf Cav Space Wolves
1 X Iron Priest Space Wolves
20 X Fenrisian Wolves
1 X Wraithknight Eldar
6 X Fire Dragons Eldar
Ok, I am stopping for now as this will get ridiculous and achieve the opposite of motivation! Alongside this motivational tool I will continue painting points which I update on the right hand side of the blog and my annual review around new year. My basic target has always been to paint a minimum of 100 minis a year which I am on target for this year so far!
So how many projects do you reckon I will complete from the lists above? Let me know in the comments and also please share links of you hobby lists / motivational techniques?
Bluddtoof here with an update on my progress towards Dreadnought number 11 for my Space Marines; the Thunderbolts. That's right, 11! I may have now reached critical mass on dreadnoughts......or maybe not!
So anyhoo, this is my second contemptor, as I said in my previous post about my latest mortis pattern I'd originally planned on a mortis contemptor, however this was shelved with the build of the mkv. Last month I visited GW HQ with some of the code boys for the FW open day and whilst browsing the store cabinets I saw the iron warriors contemptor and immediately thought "that'd look cool as a thunderbolt". Knowing I had a spare contemptor Lascannon arm in the bitz box I had a quick think about weapon options and plumped for a heavy conversion beamer and cyclone launcher (I've got plenty of assault capable dreads so another fire support dread made sense and the HCB is a nice gun.
I think this load out will make him a threat to pretty much anything non flyer and with 2 mortis dreads I've got flyers covered.
Currently...
I started the build process and straight away decided to go with sub-assemblies, which I don't usually do with my Imperial dreads. I also played with a range of basing and posing options, I considered a braced firing position but the ankles don't rotate enough to get a good look. So I decided on a stoically advancing pose with both feet posed in mid step to convey a sense of motion. I also wanted him to look like he was firing and thought through this too, I've had little success with previous attempts at OSL but I'm going to try it again on the conversion beamer and also I really wanted to try rocket exhaust modelling, (after seeing the fantastic displays at GW) so I did some research and with a little advice from the code boys I got some clump foliage and had a go.
Here's a few pics of the process of building...
The bits laid out awaiting clump foliage for the exhaust clouds.
All the load bearing joints got pinned using 1 mm uncoated jewellery wire, FW resin is very light so the pins are really only there because I don't trust "super" glue, but also to make the process of painting sub assemblies for later attachment easier.
As usual the hardest part with a contemptor is positioning of the legs and feet to get the desired pose, there are a lot of pieces to work with and super glue sets fast so you need to work quickly, again pins and dry runs are the order of the day.
Making the cyclone was really good fun and I'm pleased to have learnt a new technique, here's a series of shots...
The missiles are from the marine tactical sprues, well old ones anyway, I haven't bought a new kit so I don't know if you still get them. Carefully chop out the small, narrow shaft connecting the fins to the missile body and discard. Clean up the new surfaces and VERY carefully drill a hole in the back of the missile body and through the centre of the fin assembly.
Remove your selected missile tip(s) from the cyclone, clean and drill a hole. Fit your wire into the launcher, thread on the fin section and fit the missile body. Just the tiniest drop of thin super glue after assembly fixed the fins in place so that I could fiddle with the positioning at my leisure.
I think it's really important to use different lengths of wire to avoid an unnatural symmetry.
I spent ages wiggling and adjusting the wires to get them straight and in line!
Next the exhausts!
This was surprisingly easy, if you've not used this method then I would suggest you get some NOW! Dirt cheap, a fiver for a huge bag, and easy to use. The clumps break into bits easily but hold size and shape too allowing you to fix a clump in place and then carefully pinch little bits off to get the desired structure. Once it was built I gave the whole piece a good coat of spray matt varnish to hold it and stop the foliage from sucking up too much paint.
All in all very pleased, next post will be with more paint on it.
As ever C & C welcome.
Evening all, Dark Bristles here with a little update as too what I've been up too of late.
A good few months back I showed off a Krieg Vanquisher tank that I'd finished up....
Well my good buddy and I decided to partake in the doubles tourney this coming weekend at Worcester Wargames and I decided to give my self a (frankly pretty tight) deadline of getting 1K of my Krieg all finished up and ready to war.
So after sitting up for a while smashing out various ideas for lists, I settled on what I wanted to take and set about pumping out squads of infantry as quick as possible. Bearing in mind however this is my own personal army and a force I've been wanting to paint for a long long time (ever since I returned to the hobby in fact) I was adamant I wanted to keep the standard as high as I could.
So tight deadline and self imposed high standard. Fun fun.
I supposed a good place to start was the top of the chain so Company Command Squad with converted Master of Ordanace.....
Infantry Platoon Squads - 2 of these, a Platoon Command Squad and 3 Heavy Weapon Auto Cannon teams
Cheeky pic of the big guns....
Death Korps Death Riders. My absolute favourite models that's FW produce, I love them. PAIN IN THE BUTT to paint however haha. Found them really tricky! Powered through though and am pleased with the results.
So this is the complete force....1k of Death Krops of Krieg. Or 15 Blast Templates a turn minimum depending on how you count it :)
Anyway, this is to be run alongside my friends Militarum Tempestus formation, I'm the shield, him the the spear. Together, the Emperors Hammer!
I'll be doing my very best trying to take pictures over the course of the three games so stay tuned for a full event write up early next week :)
Thanks for looking guys and girls - Catch you in a bizzle.
Welcome to the second post in the irregular series that is "Using the Interwebs". The first post in this series can be found here. This post will concentrate on video battle reports. As no doubt most of you reading this will know, there is a mass of video battle reports out there. In fact you could replace TV completely with video bat reps should you wish too!
Having tried to put together a video battle report recently I have clearly realised the decent ones have good equipment, delivery, beautifully painted armies and scenery..... in short they are a challenge to get right.
Video battle reports can be used for multiple reasons. So what can we gleen from video battle reports? First off, along with podcasts (a future using the interwebs article) it is often something I put on when I am painting but that's not all. They can be used to; learn the rules, pick up painting inspiration, consideration of tactics for your army and often understanding armies you don't collect.
Many of the volume video battle reporters are sponsored and run a "freeview" and "pay for" channel. Personally I don't pay for any channels as I don't have the time to watch that volume of battle reports. The other thing to note many of these channels offer a free trial if you find a series of videos which particularly interests you.
So the first channel to mention is Miniwargaming. They have multiple series, rooms and systems. They produce reports for multiple systmes including warhammer 8th edition before the change to AOS. Some good reports are:
Warhammer 8th featuring Dwarfs and Tomb Kings (my two armies!)
Warhammer 30K - Horus Heresy - This is a different kind of game using Zone Mortalis.
Last battle report to share from miniwargaming is to share the start of one of their narrative campaigns. They go into a lot of detail to deliver a narrative but unfortunately put some of the reports in their subscription service the "Vault".
The next channel to mention is Table Top Tactics from Lawrence, Beard and the rest. I like this channel for understanding competitive 40k and list building. Well as I would like to "be somebody" here is some links:
First up a competitive practice report vs ACEFACE. In fact that is another good thing about this channel is the link up reports with other youtube battle report channels
Another report this time in collaboration with SN battle reports and also to mention I love the atmospherics at the beginning of the videos.
On to another of the real big boys of battle reports is Striking Scorpion 82. This channel in my opinion has the best scenery and some stunning painted models. Perhaps the main criticism is it sticks too much to the same types of games and missions. Having said that this first video is Apocalypse battle report different to the normal 1850 reports this channel sticks to in the main:
Another slightly different and narrative game involving Steel Legion and Orks (clearly I am drawn to these types of games!). This is an attack vs defence game.
Ok, I could put links in forever as I like so many video battle report channels but instead, to keep the post to a readable amount here is a list with clickable links of other notable video battle report channels:
Winters SEO - 40K / 30K channel, mentioned in first Using the Interwebs post. The Legion Wargamming - 40k The Long War - 40K, Competitive gaming Aceface - 40K (as featured in report above), Competitive gaming Geeks 40K Channel - 40K Bell of Lost Souls - Pretty much all systems, can be very inconsistent in quality Once Bitten 360 - Fantastic Warhammer 8th Reports, now moved onto the 9th age (not for me) but the channel has a large library.
I could keep going with links but I will stop there at some of the major channels I watch. I am sure this list is not exhaustive and would ask for you guys to share the links of your favourite channels below in the comments.
Quick post this evening to show my latest build project a laser destroyer vindicator. A few issues with the build not least the sides which slot together differently to standard rhino kits so watch out for that. I currently have a plan to go into a build phase for my death guard before a tank batch paint to ensure I get a consistent finish.
Also just to note the next post in the series using the inter webs will hit this weekend and will be all about video battle reports.
Bluddtoof here with a little update on my most recent work; a re-arming of a very old dreadnought. I think this was in fact the 2nd dreadnought I originally painted for my marines something in excess of 10 years ago!
Up until a last year he was a venerable dreadnought armed with an assault cannon and a massive hammer clenched in his power fist, this counted as a power fist and was from way back when I started this army and Marine forces could take traits, I can't remember which edition but the marine codex has changed somewhat! Anyway I used to field a great many thunder hammers, the fluff being that the thunder hammer was a symbol of office for most characters (I'd even converted my old termy Librarian to have a force hammer), I liked hammers I think!
Early in 2015 I decided to update my collection of dreads to have a broader range of weapons, at the time I had 4 venerables with assault cannons. the upshot of all this was a range of dreads (9 at the time) with lots of variety. The big hammer moved onto an Ironclad as a seismic hammer and I was left with this original metal venerable dreadnought with no arms. I figured 9 dreads was sufficient even for the most dread obsessed player! Incorrect! I can NEVER have sufficient dreadnoughts!
So a few months ago I decided to get number 10 armed and active; I'd been long considering a Mortis Contemptor but had just never got round to it, so having recently purchased the Imp Armour book War Machines of the Adeptus Astartes (new version) and already having a quad autocannon mortis mkv I decided to upscale to quad lascannons for that extra punch.
My bits boxes provided me with lots of spare lascannons from many kits, predators, razorbacks, dreadnoughts, flyers and landraiders. The only twin linked ones were from the predator kit but didn't really suit as they are just barrels sticking out from a curved mounting suitable for a turret, not really an arm.
I finally chose to use the landraider lascannons as they had complete power lines and generally looked the best. Admittedly they are pretty huge but I kind of like that, he looks like he means business. It was a simple task to file down the side panels of the lascannons so they would butt up together nicely to form a twin linked pair. The original hole for mounting to a side sponson served well, with a little enlargement, for mounting the pair onto the original shoulder pin, and hey presto...... twin linked lascannons at zero cost! Win!
Pics...
The painting involved a little touching up of the original model where the knife had slipped during the conversion process and some adjustment of original colours (10 to 15 years old!) to match closer to the new paints. I also added a smoke launcher, spotlight and a gothic looking gubbins to represent the helical targeting array.
Overall well pleased for a cut and shut job.
Welcome to the Thunderbolts forge, revered ancient!
That's 10 ready to roll, and number 11 on the way! More on him in the very near future...