Wednesday 31 May 2017

There has been some hobby progress - Showcase Death Guard Medusa

Evening All,

Doc here, I have been trying to write this blog post for a few days now and life seems to get in the way.  Anyway I please to be able to showcase my newly completed well since last Friday finished Medusa. This is my first tank for my death guard and I am happy with it.

This tank is on my Hobby Season list so I will also be awarding myself a giant purple sticker for the first time in quite a while hoorah....

I also snapped some work in progress pictures which I will share first up followed by the completed model.  Before I start though my first picture is my motivation to paint this army


This is a picture of a game played against Boss Bludtoof in Feb and boy has it got my goat.  This isnt me I paint my armies.  This will serve as a reminder forever more to get this army up and running!


So first off a build shot before priming and I admit they are slight pain with the canopy and the hair dryer was required to bend pieces into shape but we got there in the end.


Car park photo is next as I primed two of them, plus the scorpius and the LD vindicator at the same time.


I followed the same method of painting on this as my infantry prime vallejo grey wash agrax and 45 degree spray white.  I found this gives me a simple white armour to work from.  The photo above shows the washed stage and also sneak peaks another future project.


This shot shows the white applied and me starting to work up the metal, track work and the obligatory green stripe.


This shot is much further on with decals applied highlighting done, inside gun area completed.  For the most part this is a clean shot prior to weathering


This shot was just before completion and I lined up an infantry model for some comparison.  I think they work well together.


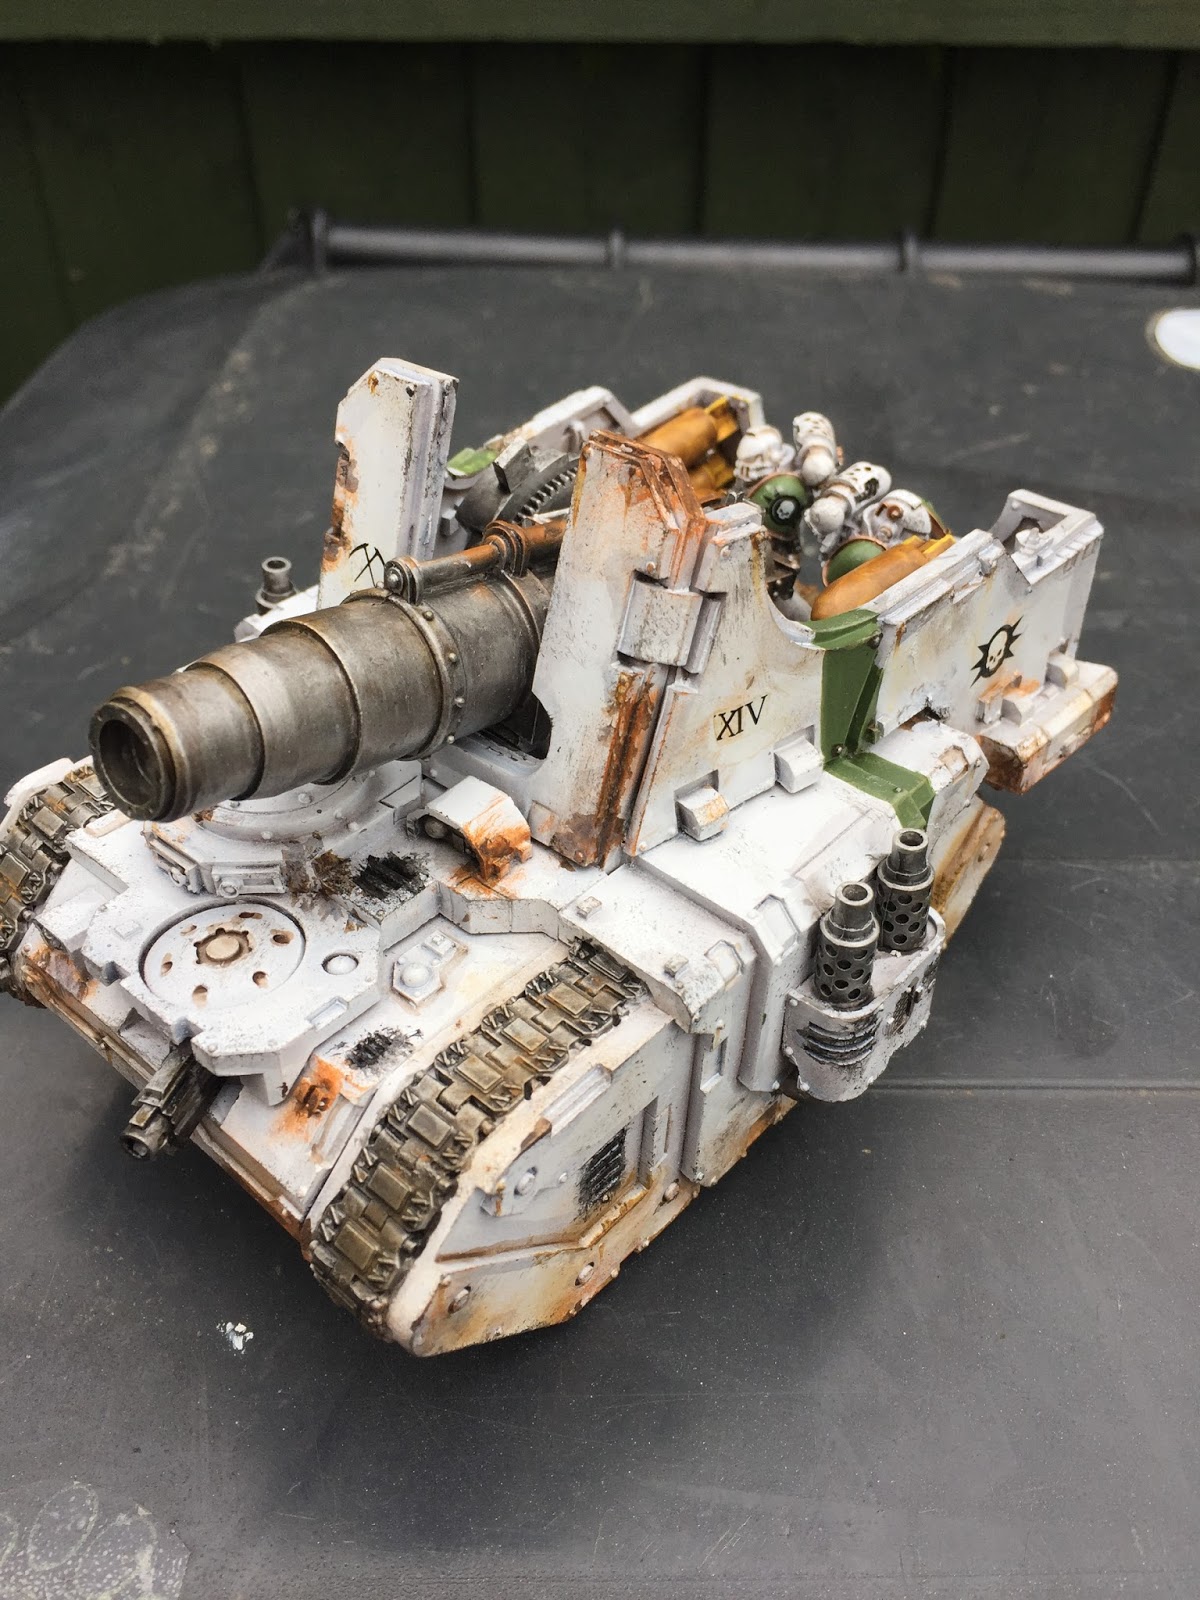
Completed shots here follow.  Only difference from above is crew added and weathering on the tracks plus a coat of Matte varnish.  I will say that is one thing I am not happy with the matte varnish dulled and in some cases removed the powder work.  So if anyone out there has any tips for sealing powders without loosing the dry effect please let me know in the comments.


I hope you like this completed model please leave me love below or constructive scorn.  On this basis I award myself a major  sticker as it is my first death guard vehicle.


Cheers DOC OUT......................................

Sunday 14 May 2017

Imperial Fists - Heresy Era.........Jumping in at the deep end!

Hi All

Bluddtoof here with a post about my new project; Heresy Era Imperial Fists.
I've always fancied an Imperial Fists army, I'm a devout loyalist but never wanted a smurf army and even though I love Iron Hands I don't much like painting black.
However like a lot of people out there my experiments with yellow over the decades have proved less than successful so an entirely yellow army has always been quite daunting!

But then.......! A couple of months ago I saw a really nice post or two on FB by a dude (whose name I can't remember) with a fantastically simple but effective recipe for a weathered yellow. His IF look really nice and the recipe works on all scales of models. If you're the dude and you're reading this then a big shout out to you! Thanks for the advice.

So the recipe as I've used it is:

Spray base of Zandri Dust,
wash in recesses and around rivets etc with seraphim sepia,
wash entire surface/model in casandora yellow,
wash entire surface/model in lamentors yellow.
leave each coat to dry thoroughly of course....

..and that's it basically for all the yellow bits.

what you get is a kinda dirty mustard yellow which already looks nicely weathered and with all the lovely detail picked out and shading/highlights done.

I spent longer waiting for drying paint than I did painting. Easy!!

Then it's just a matter of picking out all the other bits that aren't yellow, bolters and vents and eyes etc. In all honesty that took longer on the models I've done so far than the yellow did.
And finally I want a real dirty and war torn look so I'll be going big on the weathering!

So I started the army with a Typhon, that's right I jumped straight in with a massive tank because I hadn't at that point got any 30k marines yet, apart from 2 missile dudes gifted by Doc. I do now and am working on those, but more on that later.

This was a pretty risky move for me, my first experiment with the scheme and some new techniques too and on a fairly irreplaceable model but hey ho I thought!

Here's the finished model...


..and the first two marines I've completed which were kindly donated by Doc.


These were my test pieces and will eventually be joined by another 8.
I decided to deviate from the official scheme cos I like to have a nice bright spot colour on all my stuff, you generally look at models from several feet away when they're in play so in my mind they need to jump out a bit. Si I scrapped the black detailing from the books and I've gone with a nice bright red on weapon casings and markings etc. I also had my first go with decal fix too, with mixed results, I'll keep experimenting. I used Humbrol's version here.

All in all I'm well pleased with the results. As you can no doubt see I've added to the basic weathering result of the yellow recipe by using sponge weathering to create chipping and then a liberal application of weathering powders to create dirt and soot streaking. The metal was weathered by washing with various browns and orange and dry brushing the edges with silver and then weathering powders to dull it back. The transfers are from the FW sheet and are really nice, you get loads too, a good purchase in my book.

This was also my first attempt at using weathering powders and I've got to say that it only took a little while to get the hang of dry application. I'd recommend the FW masterclass books; they too are a really worthwhile investment and I've used a few of the techniques shown in them.

I hope you like how this has started, I know I do, and as always C & C welcome.
Next up is a 10 man breacher squad, then hopefully a 20 man tactical squad.

Bluddtoof

Tuesday 9 May 2017

Screaming Eagles

I was unsure exactly what I could talk about for my first posting on the Code 40k site.  In terms of painting projects, I have a lot of Blood Bowl models that need to be completed, as well as a couple of Tau squads that have been sitting under my desk for a while now.

However, the project that I am determined to work through over the coming months, and the one I’ll therefore talk about here, is my Bolt Action US Airborne Screaming Eagles platoon.

Since moving down to Surrey, I have struggled to find time to play much 40k, and with the arrival of Blood Bowl (a much shorter and easier to transport game) and the imminent arrival of 8th edition, I am not sure when I’ll get to play again.

Fortunately, a colleague at work is a keen historical gamer (well pretty much a play-anything gamer) and I have tried a number of different rule-sets with him and another colleague over the past two years, the most enjoyable perhaps being Warlord Games’ Bolt Action.

American Civil War 

Epic 40k

Waterloo


Without going too much into the game itself, we have been playing out a number of scenarios based around his British army, another friends’ US army and my German Fallschirmjager army. 

Normandy farm

Fallschirmjager (German paratroopers)

Now the Fallschirmjager are fun for my first dabble into Bolt Action (and they play pretty well too) but I always like to have a couple of armies at least and what better counter to my German Elite Paratroopers than the American Airborne division, and having recently re-watched the series I wanted to base a list loosely on the force portrayed in the HBO show Band of Brothers.

I purchased the first unit, a squad of ten metal soldiers, about 9 months ago but didn’t really start work on them until much later, and really the whole army has been on the back foot until recently.  The release of the new Bolt Action boxed set last autumn did spark my interest once more, but I was rather disheartened as the plastic airborne models included in this set were based on the later war uniform. 

101st US Airborne (Screaming Eagles)


As a side note I should probably add that for the Historical Gamer, accuracy is key and the correct unit-type for the correct era is very important.  As I had already committed to my force being based around the time of the Normandy landings, I was also committing to keeping to the older metal miniatures in the older style uniforms.

I started my army with a simple 8 man squad supported by a HQ unit, mortar team, a medium machine gun team as well as a “bazooka” team.  This probably amounts to around 300 to 400 points so I knew I needed more as a decent game needs around 1000 to 1500 points worth of models.  

Fortunately Warlord answered my prayers with an offer of 10% off all US models in the Bolt Action range.  With this I went on to purchase a number of new models, including a jeep, two more infantry squads and an artillery gun.   Once painted up, this should give me enough to start using the army in a well-balanced game and open the way for future development with the addition of heavy support, such as a tank or two.

WIP (Howitzer team)


The project is just starting (and other armies/teams need attention too) so I am happy to work through this for the next few months without rushing.  I’ll do my best to provide an update in a month or so.

Next on the to-do list...