Sunday 31 July 2016

MkV Mortis Pattern Dreadnought; Thunderbolts Space Marines

Hi All

Bluddtoof here with a little update on my most recent work; a re-arming of a very old dreadnought. I think this was in fact the 2nd dreadnought I originally painted for my marines something in excess of 10 years ago!
Up until a last year he was a venerable dreadnought armed with an assault cannon and a massive hammer clenched in his power fist, this counted as a power fist and was from way back when I started this army and Marine forces could take traits, I can't remember which edition but the marine codex has changed somewhat! Anyway I used to field a great many thunder hammers, the fluff being that the thunder hammer was a symbol of office for most characters (I'd even converted my old termy Librarian to have a force hammer), I liked hammers I think!
Early in 2015 I decided to update my collection of dreads to have a broader range of weapons, at the time I had 4 venerables with assault cannons. the upshot of all this was a range of dreads (9 at the time) with lots of variety. The big hammer moved onto an Ironclad as a seismic hammer and I was left with this original metal venerable dreadnought with no arms. I figured 9 dreads was sufficient even for the most dread obsessed player! Incorrect! I can NEVER have sufficient dreadnoughts!
So a few months ago I decided to get number 10 armed and active; I'd been long considering a Mortis Contemptor but had just never got round to it, so having recently purchased the Imp Armour book War Machines of the Adeptus Astartes (new version) and already having a quad autocannon mortis mkv I decided to upscale to quad lascannons for that extra punch.
My bits boxes provided me with lots of spare lascannons from many kits, predators, razorbacks, dreadnoughts, flyers and landraiders. The only twin linked ones were from the predator kit but didn't really suit as they are just barrels sticking out from a curved mounting suitable for a turret, not really an arm.
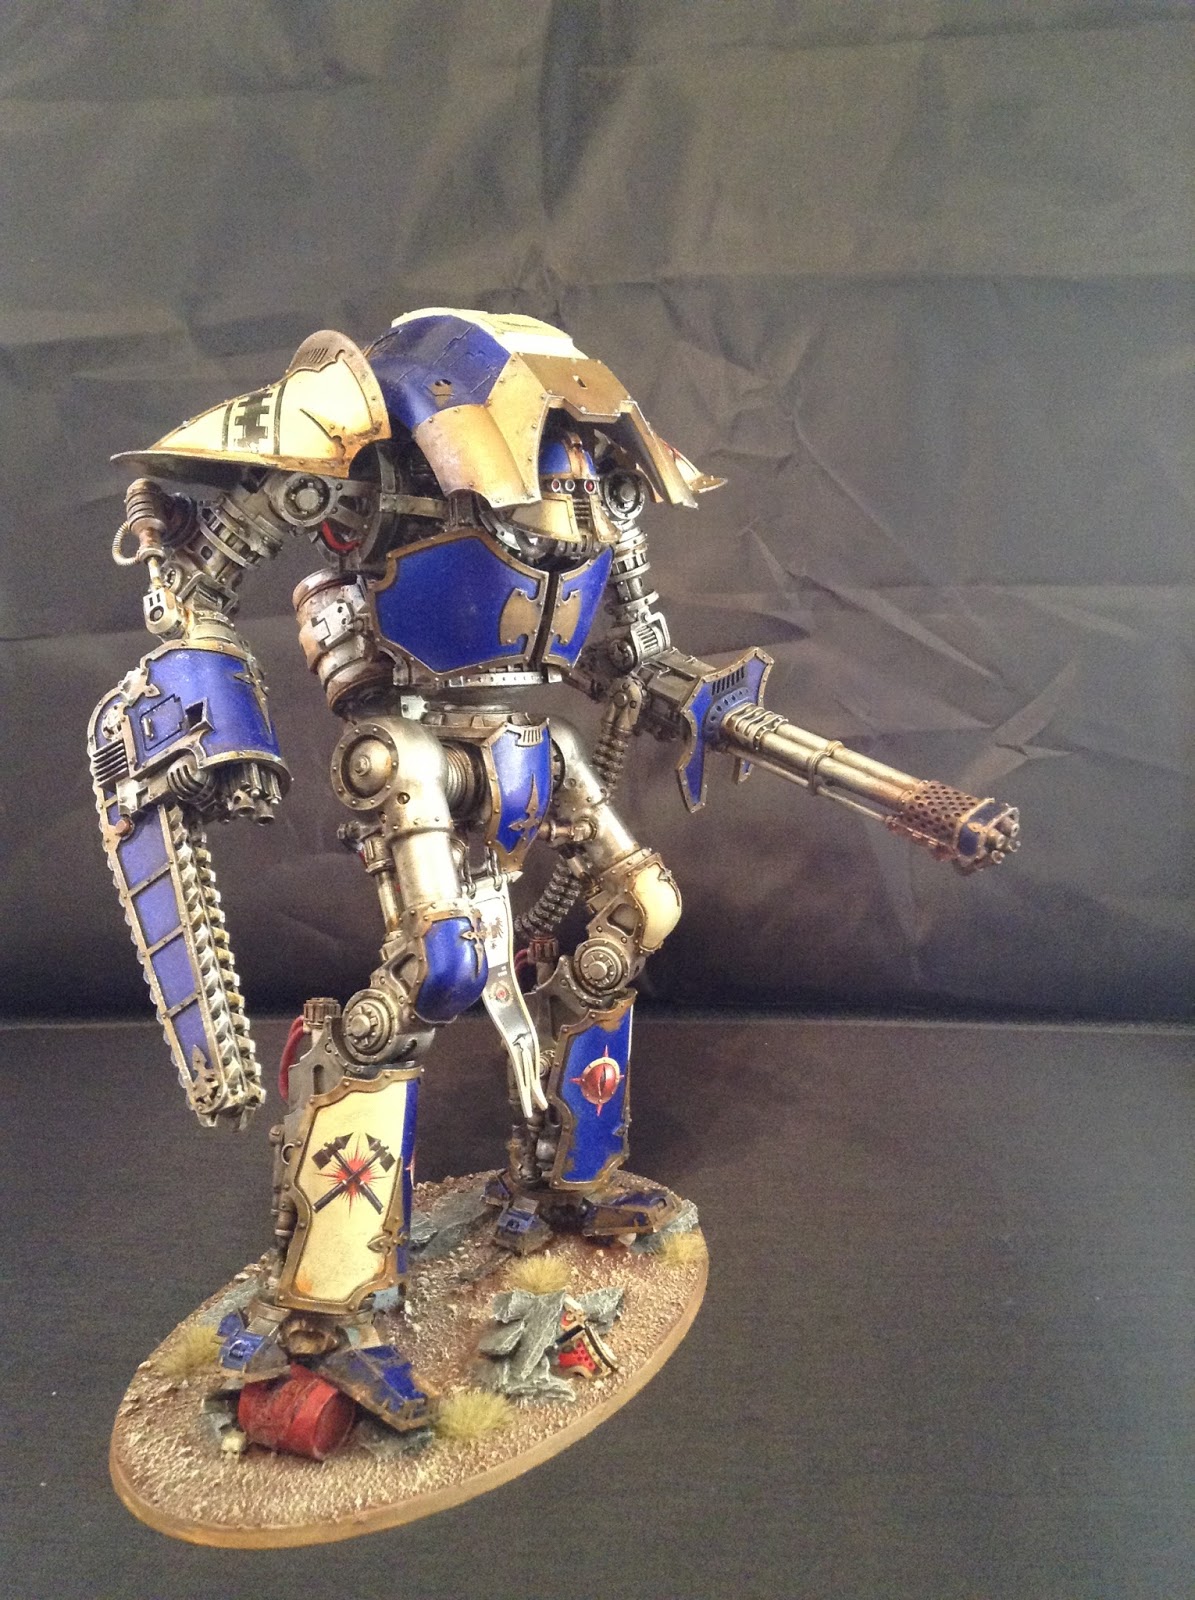
I finally chose to use the landraider lascannons as they had complete power lines and generally looked the best. Admittedly they are pretty huge but I kind of like that, he looks like he means business. It was a simple task to file down the side panels of the lascannons so they would butt up together nicely to form a twin linked pair. The original hole for mounting to a side sponson served well, with a little enlargement, for mounting the pair onto the original shoulder pin, and hey presto...... twin linked lascannons at zero cost! Win!

Pics...


The painting involved a little touching up of the original model where the knife had slipped during the conversion process and some adjustment of original colours (10 to 15 years old!) to match closer to the new paints. I also added a smoke launcher, spotlight and a gothic looking gubbins to represent the helical targeting array.
Overall well pleased for a cut and shut job.
Welcome to the Thunderbolts forge, revered ancient!
That's 10 ready to roll, and number 11 on the way! More on him in the very near future...

C and C welcome as ever....

Bluddtoof

Thursday 28 July 2016

Using the Interwebs for Hobby Purposes - Mechanicum


Hi All,

Doc here with the start of a semi regular series called 'using the interwebs'.  Whats that all about I hope you ask?  Well like most hobby modelers I use the internet to pick up tips, see great paint jobs, understand battle tactics, watch video bat reps and video tutorials.  In honesty just about anything. Over the years of doing this I have bookmarked, followed  and linked to a number of quality sites which I go back to time and time again.

This series aim is to create a mini resource for a theme of my choosing providing you guys the reader with a ton of links which will be helpful to the chosen topic area.  I hope by doing this I can direct people to some of the internet's hidden gems.

For the first theme I have deliberately chosen something I have no personal involvement in but have just watched from afar the Mechanicum.

Saturday 23 July 2016

Mechanicum - Thanatar Siege Automata Showcase

Mechanicum - Thanatar Siege Automata

After building the first of my Mechanicum force I thought it was about time I worked out a paint scheme. The Thanatar Siege Automata is an absolutely cracking miniature to paint. I really enjoyed this guy, especially some of the techniques. I'd not painted yellow armour before so I quite fancied giving it a go to see how difficult it was. To be honest its not the easiest and isn't very forgiving if you make any slips but it does let you get some great contrast of colours.
Thanatar Siege Automata


I've kept the colours really simple to try and give it a specific style. I airbrushed a Vallejo Black primer to start and then working up in gradual light coats from Charred Brown to Heavy Brown and finally with Golden Yellow. The Black Primer results in a muted flat yellow which is what I was after. Shading was done with Charred Brown airbrushed from underneath and I Pin washed all the cracks with Sepia Wash. I added some weathering/chipping to the armour which I was pleased with, it seems to show up nicely on yellow armour. I added the edge highlights with Lemon yellow. The only thing I'm a tad disappointed with was the metal parts which I found difficult to bring out more, other than drybrushing various steel/silver shades and washing with Nuln Oil, there wasn't much more I could think to do. I didn't want a heavily weathered metal look so kind of kept it simple. Having done Blue OSL before I fancied a change and thought the purple/pink plasma would compliment the yellow fairly well. I'm reasonably pleased with the outcome. All I need to do now is decide on a house for my mechanicum and get some transfers which I think would finish it off properly.
Anyway, hope you like, Any questions or C&C always welcome 

Luko Dakka

Friday 15 July 2016

Cerastus Knight Acheron Showcase - House Makabius

Hi all,

Doc here back with the finished knight as promised.  The weathering process was just a load of real fun and very dirty!  So on to some pictures and few salient points. Firstly also to thank Innermech for the loan of the light box.

All the previous posts on this project can be found here, here and finally here.


So the obligatory front on shot first.  The imperial knight helmet has been painted to match Boss Bludtoof's knight (just had to be! and for info his knight can be found here).  A couple of minor things remain to be done the symbol of allegiance and a coat of varnish to seal the powders down.


This view shows the knight crunching a barrel I envisage the barrel would literally be as flat as pancake after a knight stood on it but thought it broke up the base in a different way.  There are also bits of metal, grave stone, rocks, skulls and bushes dotted around the base.  On the shoulder pad the transfer has also been highlighted as I noted not all the transfers were highlighted,  I thought about blood on the reaper chainsword and then decided against it, although I might go back and add it.  What do you guys think?


On to the other side and certainly the hardest part to put together a whole load of patience to get the feeder tube in the right place and a lot of use and my wife's hairdryer.  Painting wise I went for the scorched look on the gun and then slowly reduced the burnt affect the further away from the barrel.


The back not so exciting but still lots of work.  This shot shows the spot colour of red I used on the pipes and shows a lot of the weathering off particularly on the tank and vents at the top of back.

Overall really happy with him let me have your thoughts people of blogosphere!

Cheers

DOC out..........


Friday 8 July 2016

Cerastus Knight Acheron - WIP #2

Hi All,

Wowsers I have been away from the blog and hobby for a while, apologies for that and now it is time to get my mojo back! It is also bad timing as traditionally code40k members tail back the hobby work over the summer months meaning blog posts have been a little thin on the ground.  Anyway trying to get back going again now...

So I have gone back my Knight Acheron and for those of you who need reminding or missed it the original build post is here and the first WIP is here.

In order to go any further I need to get all the waterslide transfers in place or decals depending on where you are in the world.  I have bought the House Makabius set from forgeworld.  This is mainly because I intend to paint 4 knights in this colour scheme.   Over the years transfers have been a bane and I still dont like them but since switching to the Micro -Set and Micro Sol method it has become easier.  I would recommend the following youtube video for an explanation:


And the following video as a tutorial:


Here are some photos of the transfers in place before weathering:


My main top tip for this post is to always apply the transfers before weathering which is a mistake I made a while back. To not do so means they look out of place and pristine with the rest of the model looking weathered.  As you can see from the pictures above I have successfully applied all the transfers.  The most difficult transfer which is not pictured is the banner transfer which hangs between the legs.  The banner is curved and the micro sol came in particularly handy for the banner piece.

So with transfers applied the next stage will be to complete the base and then finish weathering followed by completed assembly.  I hope to show you a completed knight in the next two weeks.

So nice to be back in the saddle 

Cheers

DOC out