Thursday 28 July 2016

Using the Interwebs for Hobby Purposes - Mechanicum


Hi All,

Doc here with the start of a semi regular series called 'using the interwebs'.  Whats that all about I hope you ask?  Well like most hobby modelers I use the internet to pick up tips, see great paint jobs, understand battle tactics, watch video bat reps and video tutorials.  In honesty just about anything. Over the years of doing this I have bookmarked, followed  and linked to a number of quality sites which I go back to time and time again.

This series aim is to create a mini resource for a theme of my choosing providing you guys the reader with a ton of links which will be helpful to the chosen topic area.  I hope by doing this I can direct people to some of the internet's hidden gems.

For the first theme I have deliberately chosen something I have no personal involvement in but have just watched from afar the Mechanicum.

Saturday 23 July 2016

Mechanicum - Thanatar Siege Automata Showcase

Mechanicum - Thanatar Siege Automata

After building the first of my Mechanicum force I thought it was about time I worked out a paint scheme. The Thanatar Siege Automata is an absolutely cracking miniature to paint. I really enjoyed this guy, especially some of the techniques. I'd not painted yellow armour before so I quite fancied giving it a go to see how difficult it was. To be honest its not the easiest and isn't very forgiving if you make any slips but it does let you get some great contrast of colours.
Thanatar Siege Automata


I've kept the colours really simple to try and give it a specific style. I airbrushed a Vallejo Black primer to start and then working up in gradual light coats from Charred Brown to Heavy Brown and finally with Golden Yellow. The Black Primer results in a muted flat yellow which is what I was after. Shading was done with Charred Brown airbrushed from underneath and I Pin washed all the cracks with Sepia Wash. I added some weathering/chipping to the armour which I was pleased with, it seems to show up nicely on yellow armour. I added the edge highlights with Lemon yellow. The only thing I'm a tad disappointed with was the metal parts which I found difficult to bring out more, other than drybrushing various steel/silver shades and washing with Nuln Oil, there wasn't much more I could think to do. I didn't want a heavily weathered metal look so kind of kept it simple. Having done Blue OSL before I fancied a change and thought the purple/pink plasma would compliment the yellow fairly well. I'm reasonably pleased with the outcome. All I need to do now is decide on a house for my mechanicum and get some transfers which I think would finish it off properly.
Anyway, hope you like, Any questions or C&C always welcome 

Luko Dakka

Friday 15 July 2016

Cerastus Knight Acheron Showcase - House Makabius

Hi all,

Doc here back with the finished knight as promised.  The weathering process was just a load of real fun and very dirty!  So on to some pictures and few salient points. Firstly also to thank Innermech for the loan of the light box.

All the previous posts on this project can be found here, here and finally here.


So the obligatory front on shot first.  The imperial knight helmet has been painted to match Boss Bludtoof's knight (just had to be! and for info his knight can be found here).  A couple of minor things remain to be done the symbol of allegiance and a coat of varnish to seal the powders down.


This view shows the knight crunching a barrel I envisage the barrel would literally be as flat as pancake after a knight stood on it but thought it broke up the base in a different way.  There are also bits of metal, grave stone, rocks, skulls and bushes dotted around the base.  On the shoulder pad the transfer has also been highlighted as I noted not all the transfers were highlighted,  I thought about blood on the reaper chainsword and then decided against it, although I might go back and add it.  What do you guys think?


On to the other side and certainly the hardest part to put together a whole load of patience to get the feeder tube in the right place and a lot of use and my wife's hairdryer.  Painting wise I went for the scorched look on the gun and then slowly reduced the burnt affect the further away from the barrel.


The back not so exciting but still lots of work.  This shot shows the spot colour of red I used on the pipes and shows a lot of the weathering off particularly on the tank and vents at the top of back.

Overall really happy with him let me have your thoughts people of blogosphere!

Cheers

DOC out..........


Friday 8 July 2016

Cerastus Knight Acheron - WIP #2

Hi All,

Wowsers I have been away from the blog and hobby for a while, apologies for that and now it is time to get my mojo back! It is also bad timing as traditionally code40k members tail back the hobby work over the summer months meaning blog posts have been a little thin on the ground.  Anyway trying to get back going again now...

So I have gone back my Knight Acheron and for those of you who need reminding or missed it the original build post is here and the first WIP is here.

In order to go any further I need to get all the waterslide transfers in place or decals depending on where you are in the world.  I have bought the House Makabius set from forgeworld.  This is mainly because I intend to paint 4 knights in this colour scheme.   Over the years transfers have been a bane and I still dont like them but since switching to the Micro -Set and Micro Sol method it has become easier.  I would recommend the following youtube video for an explanation:


And the following video as a tutorial:


Here are some photos of the transfers in place before weathering:


My main top tip for this post is to always apply the transfers before weathering which is a mistake I made a while back. To not do so means they look out of place and pristine with the rest of the model looking weathered.  As you can see from the pictures above I have successfully applied all the transfers.  The most difficult transfer which is not pictured is the banner transfer which hangs between the legs.  The banner is curved and the micro sol came in particularly handy for the banner piece.

So with transfers applied the next stage will be to complete the base and then finish weathering followed by completed assembly.  I hope to show you a completed knight in the next two weeks.

So nice to be back in the saddle 

Cheers

DOC out


Tuesday 14 June 2016

Warhammer Fest 2016

Good evening all, sorry, it feels like an age since I last posted anything! I've been mooching through some of my recent pictures and I've got so much to update you all with I'm going to break what would be one humongous post post into 3 or 4 posts over the next week or so. 

Basically so I don't bore you all to death. 

Or wear my fingers out typing forever.

Win win really :)

Anyway, first up shall be a (very) brief review of Warhammer Fest 2016 which I atttended with my good friend Ian last month. 
Neither of use were massively enthused to attend this year following a somewhat lack lustre effort on GW's behalf the year prior, but seeing as we were both free on the date and my friend was passing the venue on his way back from a family visit we decided to go along and see what had changed.

We didn't regret the decision at all.

In what appears to be massive change of direction from the GW of old, the entire event seemed to be packed with exactly what was missing from the year before. There were game boards to play on (should you have brought an army..), silver tower trial games being ran, fun 'create a base' timed challenges, many many third party video games being displayed and shown off along with games workshop key staff show casing everything about the hobby and more than happy to spend the time to talk to you about what have been doing or what interested them etc. We must have spent a good 20 minutes chatting with one of the team members responsible for creating all the AWESOME dioramas in the exhibition hall, thoroughly enjoyable talk and a really nice guy who seemed passionate about his job. (Although it must be easy to be passionate about making awesome set ups when the hardest thing you have to do is try and reason to your boss exactly why you want to smash a drop pod into a war lord Titans head....)

Due to some poor information from one of the door staff we missed where exactly we were meant to sign up for the seminars so missed out on the forge world event BUT having opted to view the black library's effort think we actually came away better off for it....great seeing and hearing some of the writers who's works I've been buried in over the last few years and hearing what they are planning next!

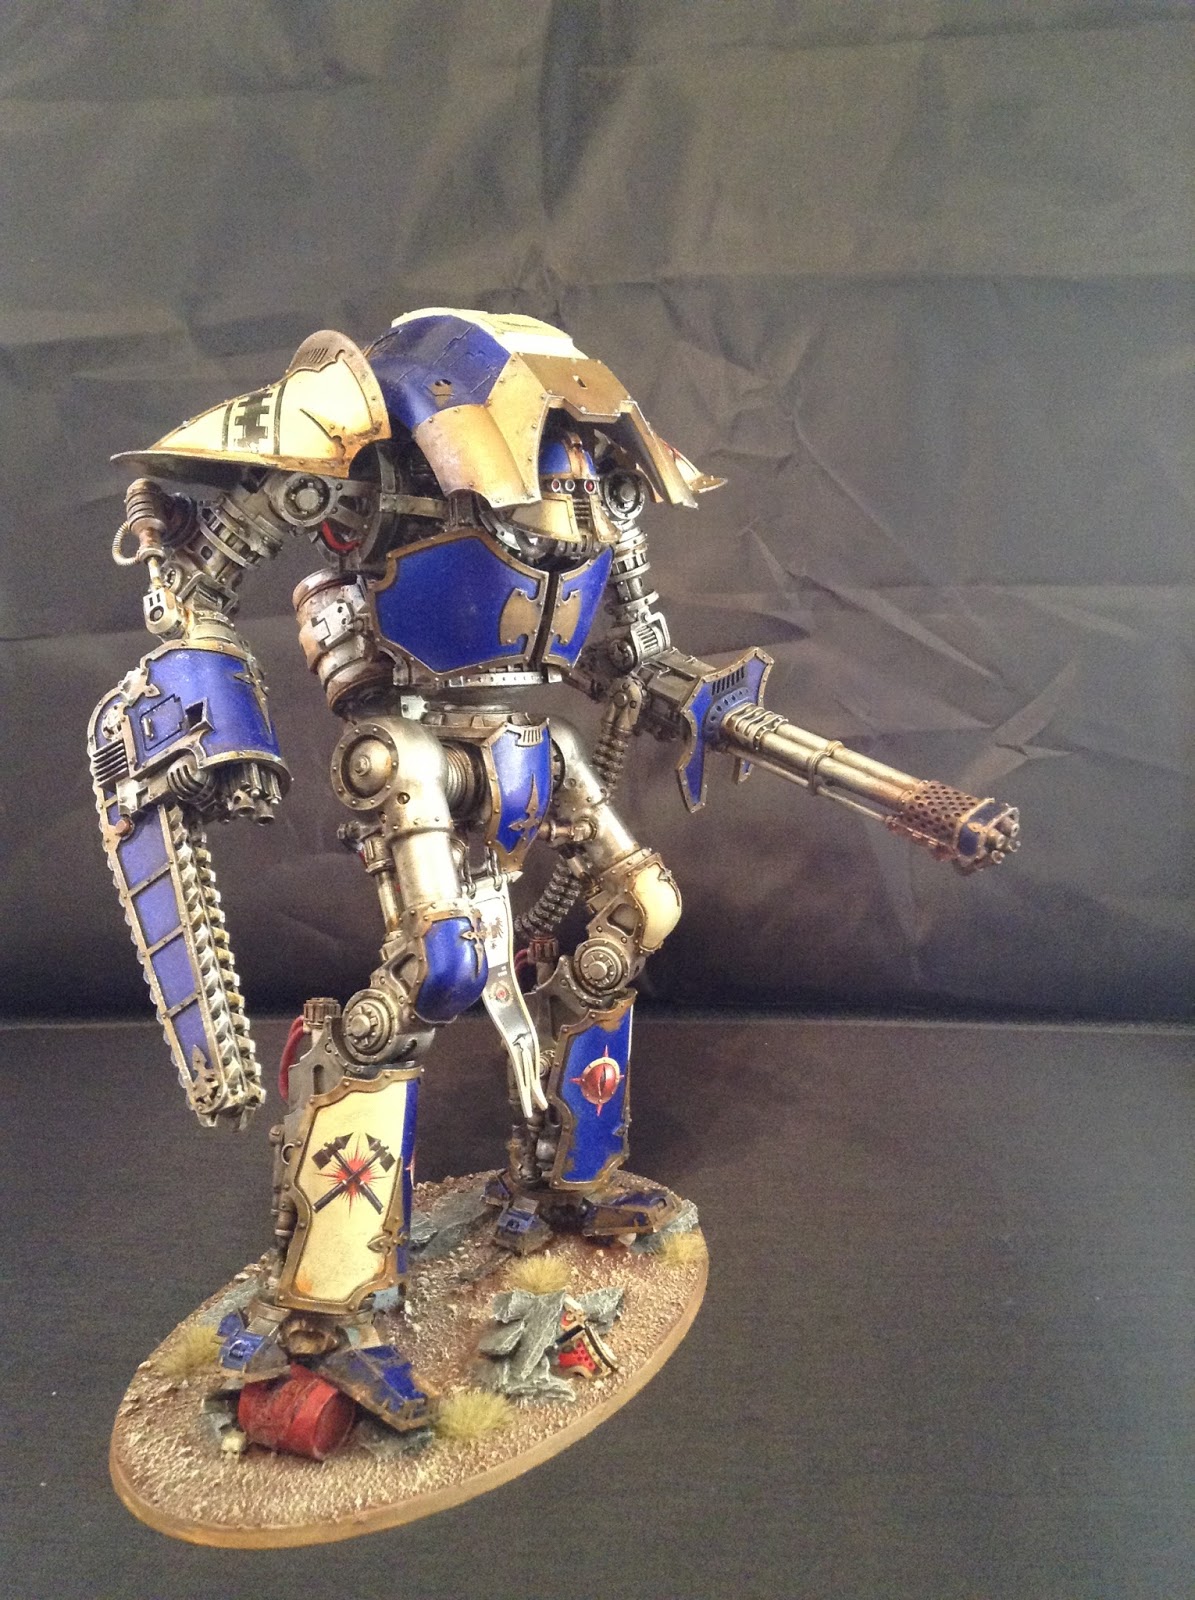
Anyway - on a whim I decided to take along 2 minis of mine to try my luck in the golden demon painting competition. I decided to enter Garro, hand of the sigilite (as I though he was probably one of my best) but he was placed in the cabinet alongside a simply much much better Garro haha so that was a bit of a pointless venture and (almost as an after thought) I decided to try my Onagar Dune Walker out as it attracted some nice attention on Facebook. 

Yup....not sure how exactly, but when I went to collect Garro and the Walker the guy handed me Garro but said 
" Sorry buddy, I can't let you have the other model just yet - you've made the finals, congratulations" 

Wow, TOTALY stunned that I managed to come away with a Golden Demon finalists pin.....rather a happy boy with that result! Especially to even be considered along side some of the other finalists was an honour, as ever the standard was incredibly high. 

Anyway, Warhammer Fest was a triumphant return to form and I'll be 100% in attendance next year (all things wiling ofc) and on that note I'll bid you good night for now - next time I'll get some pics down of my latest little board game purchase 'Kingdom Death' that some of us from the Code managed to sit down and play a few rounds of. 

Thanks for reading :) until next time. 

Tom