Showing posts with label Weathering. Show all posts

Friday 17 November 2017

Showcase Imperial Regiment the 19th Dicers Valkyrie

Hi All,

Doc is on a roll here is post no 3 in just under 10 days!  Anyway this post showcases the finished Valkyrie for Skirmish 3 unfortunately I didn't quite get it finished for the next cyrpa mission which Boss will write up soon.

I don't normally talk much about tactics preferring to talk fluff and hobby stuff but I quickly learnt equipping this model with lascannon and hellstrike missiles meant it was useless 2 shots a turn hitting on 5's if you moved.....  Anyway equipping it with Lascannon, Multiple Rockets Pods and 2 Heavy Bolters however works much better especially as the new codex allows you to move in hoover mode and not suffer the -1 to hit.

Since retrofitting it the results are much more encouraging and I haven't found loosing the -1 to hit by being in hoover mode too much of a problem it is still toughness 7 with 14 wounds.

Anyway on to the showcase hope you like...


As always constructive comments are most welcome...

Cheers

DOC out....................................................

Friday 10 November 2017

Showcase Imperial Regiment the 19th Dicers Basilisk

Hi All,

As promised a first completed post for the dicers as I head into Six up Save's skirmish 3 event.  As i mentioned in the previous WIP post this model is a rescue from my youth.  Since the last post I decided to build some crew from my bits box and went to town on the weathering.  In the end given the age of the model I am really happy with the end result.

I even managed to bob round to innermechs and use his photo booth to snap some better shots:


Overall happy with the finish and it matches nicely some of the earlier tanks.  Not bad considering the time lapse between them being completed and the fact the earthy red is a mixed paint!


The beady eyed will notice the tracks are not perfect and I debated trying to take them all off and sourcing new ones but two things stopped that time and money.  After all this model has a history with me and the little bit of track reminds me of that!


Second crew member complete with hammer and pistol essential basilisk firing equipment surely..............


For those who may be interested in an alternative head this crew men's head came from victoria minatures all the way from aus!

Hope you like as always please give me some constructive feedback.

Cheers

Doc Out...............................................................

Wednesday 31 May 2017

There has been some hobby progress - Showcase Death Guard Medusa

Evening All,

Doc here, I have been trying to write this blog post for a few days now and life seems to get in the way.  Anyway I please to be able to showcase my newly completed well since last Friday finished Medusa. This is my first tank for my death guard and I am happy with it.

This tank is on my Hobby Season list so I will also be awarding myself a giant purple sticker for the first time in quite a while hoorah....

I also snapped some work in progress pictures which I will share first up followed by the completed model.  Before I start though my first picture is my motivation to paint this army


This is a picture of a game played against Boss Bludtoof in Feb and boy has it got my goat.  This isnt me I paint my armies.  This will serve as a reminder forever more to get this army up and running!


So first off a build shot before priming and I admit they are slight pain with the canopy and the hair dryer was required to bend pieces into shape but we got there in the end.


Car park photo is next as I primed two of them, plus the scorpius and the LD vindicator at the same time.


I followed the same method of painting on this as my infantry prime vallejo grey wash agrax and 45 degree spray white.  I found this gives me a simple white armour to work from.  The photo above shows the washed stage and also sneak peaks another future project.


This shot shows the white applied and me starting to work up the metal, track work and the obligatory green stripe.


This shot is much further on with decals applied highlighting done, inside gun area completed.  For the most part this is a clean shot prior to weathering


This shot was just before completion and I lined up an infantry model for some comparison.  I think they work well together.


Completed shots here follow.  Only difference from above is crew added and weathering on the tracks plus a coat of Matte varnish.  I will say that is one thing I am not happy with the matte varnish dulled and in some cases removed the powder work.  So if anyone out there has any tips for sealing powders without loosing the dry effect please let me know in the comments.


I hope you like this completed model please leave me love below or constructive scorn.  On this basis I award myself a major  sticker as it is my first death guard vehicle.


Cheers DOC OUT......................................

Sunday 14 May 2017

Imperial Fists - Heresy Era.........Jumping in at the deep end!

Hi All

Bluddtoof here with a post about my new project; Heresy Era Imperial Fists.
I've always fancied an Imperial Fists army, I'm a devout loyalist but never wanted a smurf army and even though I love Iron Hands I don't much like painting black.
However like a lot of people out there my experiments with yellow over the decades have proved less than successful so an entirely yellow army has always been quite daunting!

But then.......! A couple of months ago I saw a really nice post or two on FB by a dude (whose name I can't remember) with a fantastically simple but effective recipe for a weathered yellow. His IF look really nice and the recipe works on all scales of models. If you're the dude and you're reading this then a big shout out to you! Thanks for the advice.

So the recipe as I've used it is:

Spray base of Zandri Dust,
wash in recesses and around rivets etc with seraphim sepia,
wash entire surface/model in casandora yellow,
wash entire surface/model in lamentors yellow.
leave each coat to dry thoroughly of course....

..and that's it basically for all the yellow bits.

what you get is a kinda dirty mustard yellow which already looks nicely weathered and with all the lovely detail picked out and shading/highlights done.

I spent longer waiting for drying paint than I did painting. Easy!!

Then it's just a matter of picking out all the other bits that aren't yellow, bolters and vents and eyes etc. In all honesty that took longer on the models I've done so far than the yellow did.
And finally I want a real dirty and war torn look so I'll be going big on the weathering!

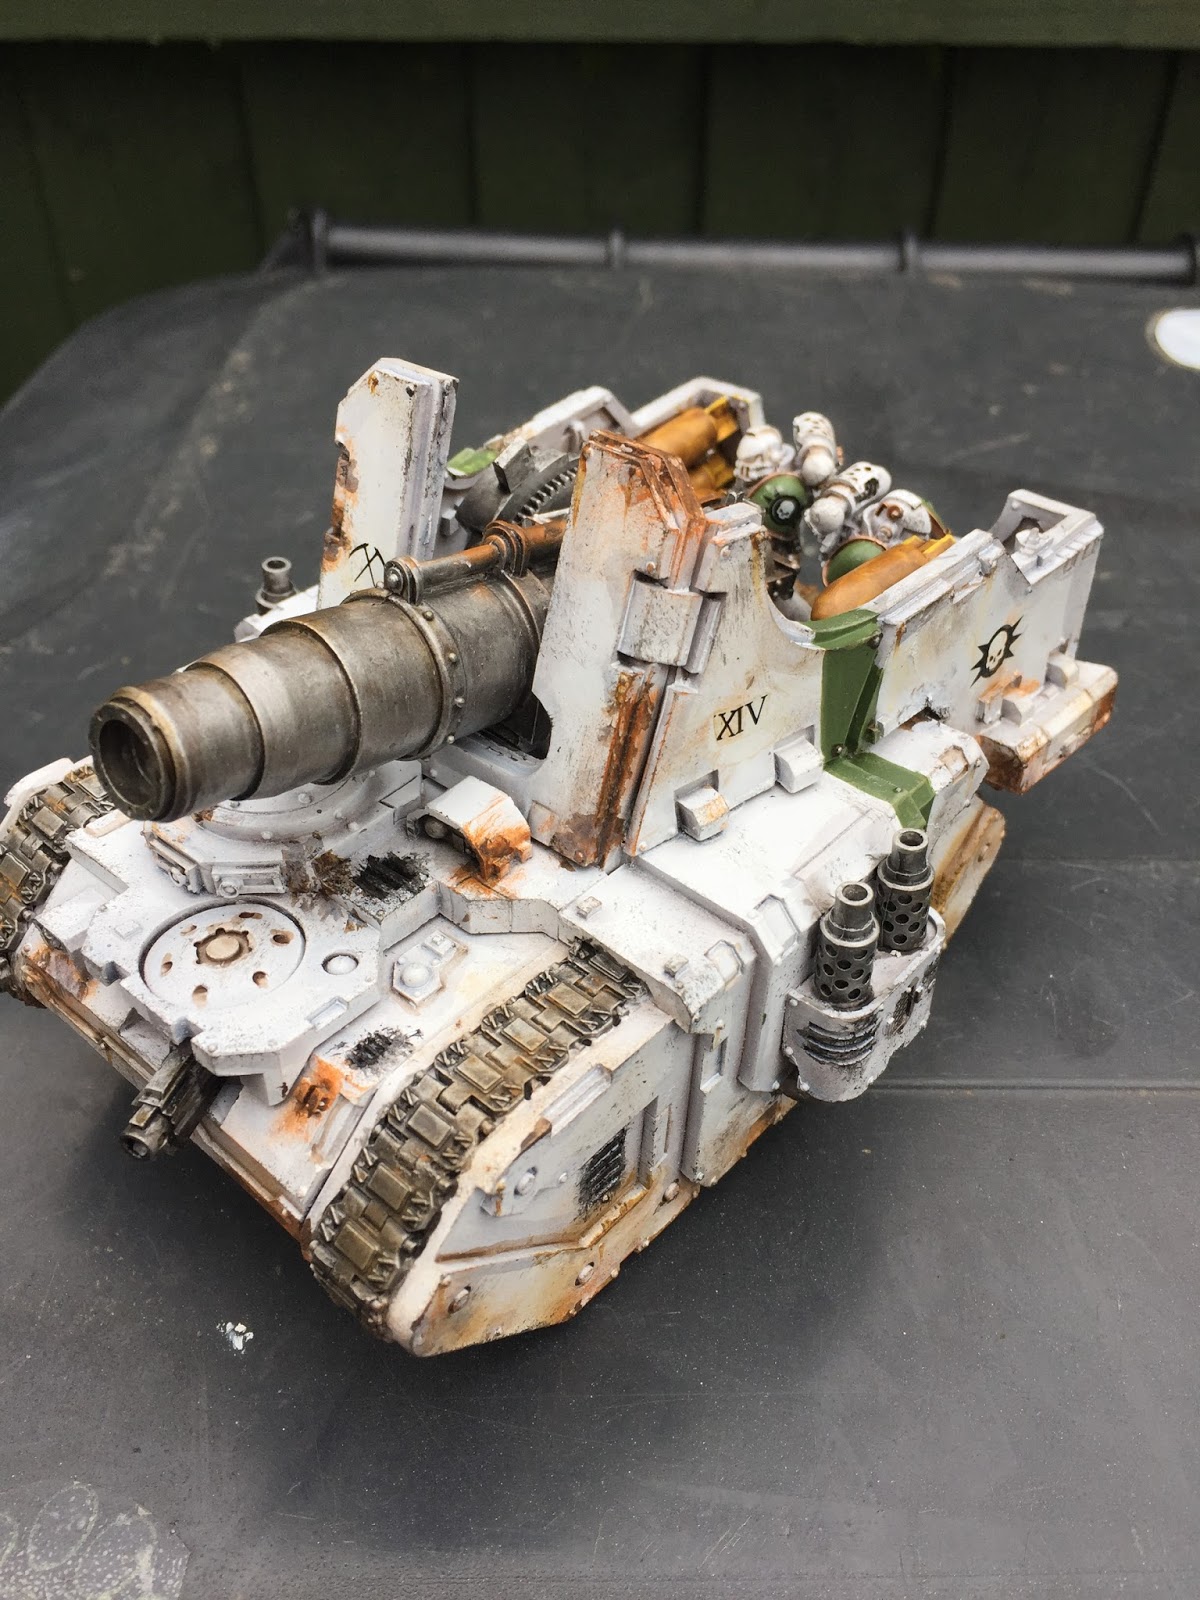
So I started the army with a Typhon, that's right I jumped straight in with a massive tank because I hadn't at that point got any 30k marines yet, apart from 2 missile dudes gifted by Doc. I do now and am working on those, but more on that later.

This was a pretty risky move for me, my first experiment with the scheme and some new techniques too and on a fairly irreplaceable model but hey ho I thought!

Here's the finished model...


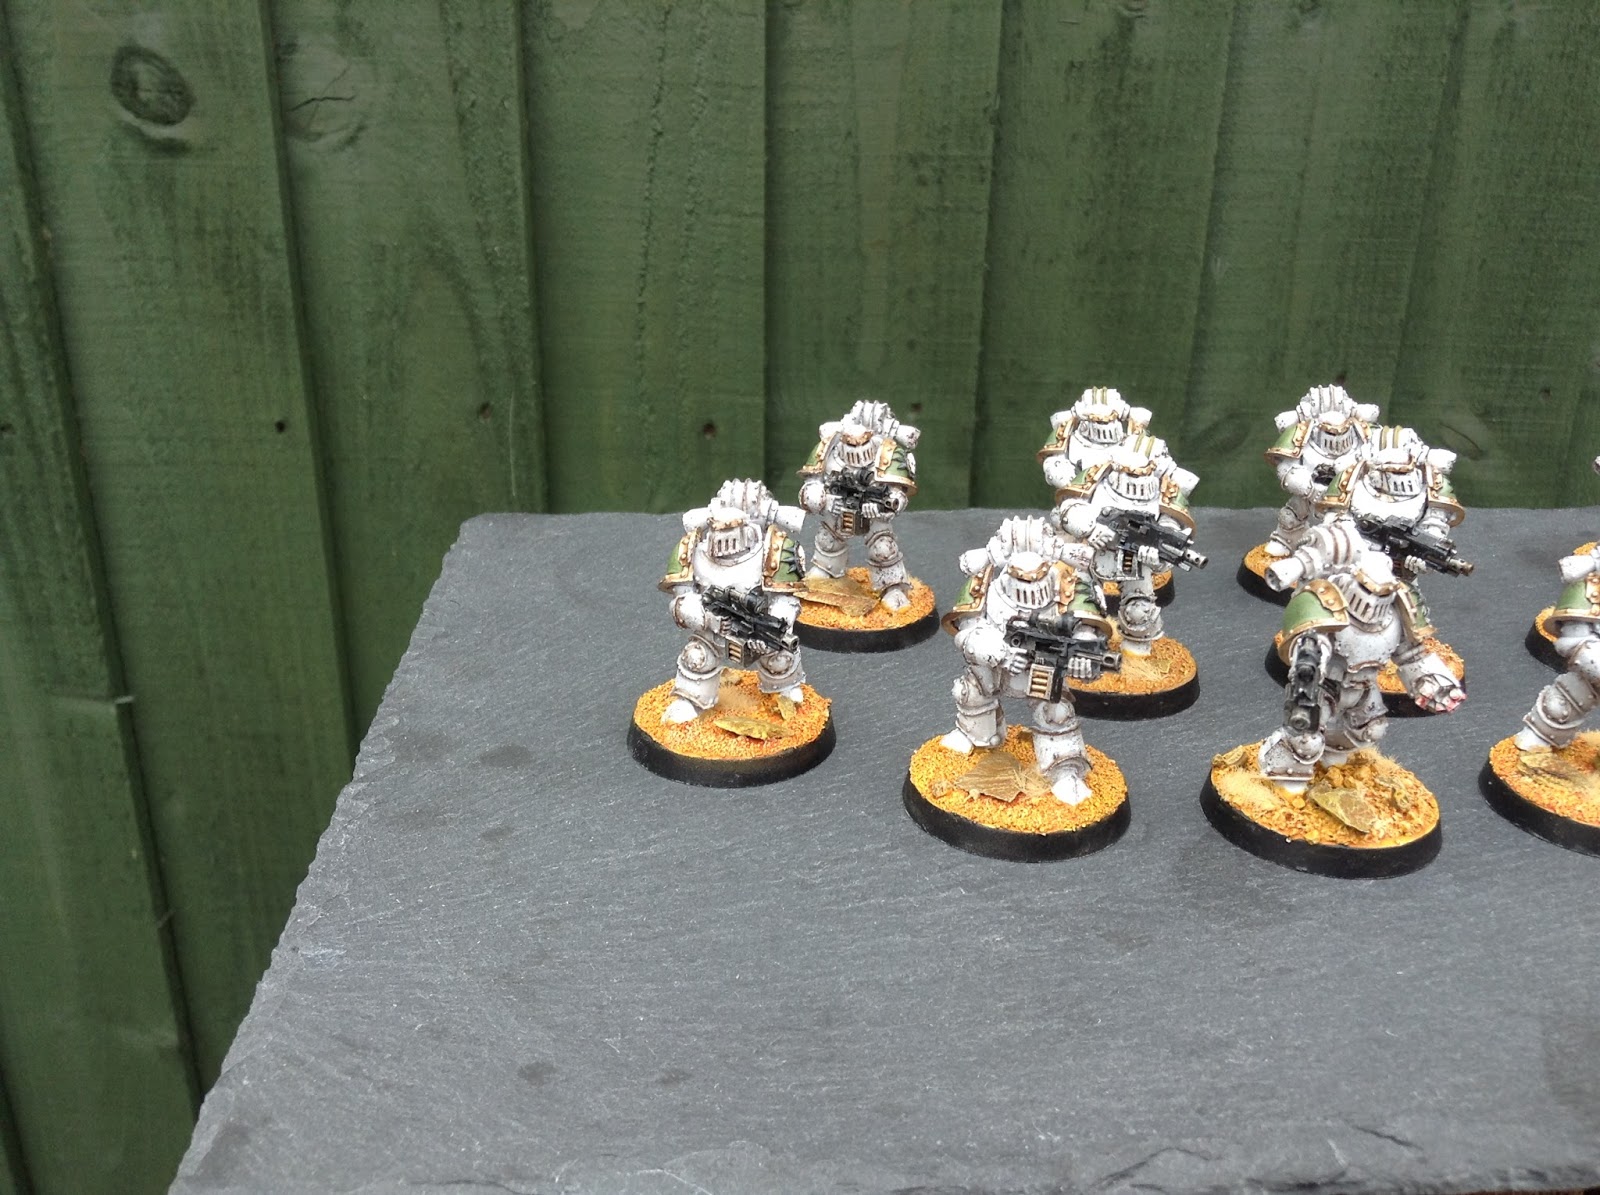
..and the first two marines I've completed which were kindly donated by Doc.


These were my test pieces and will eventually be joined by another 8.
I decided to deviate from the official scheme cos I like to have a nice bright spot colour on all my stuff, you generally look at models from several feet away when they're in play so in my mind they need to jump out a bit. Si I scrapped the black detailing from the books and I've gone with a nice bright red on weapon casings and markings etc. I also had my first go with decal fix too, with mixed results, I'll keep experimenting. I used Humbrol's version here.

All in all I'm well pleased with the results. As you can no doubt see I've added to the basic weathering result of the yellow recipe by using sponge weathering to create chipping and then a liberal application of weathering powders to create dirt and soot streaking. The metal was weathered by washing with various browns and orange and dry brushing the edges with silver and then weathering powders to dull it back. The transfers are from the FW sheet and are really nice, you get loads too, a good purchase in my book.

This was also my first attempt at using weathering powders and I've got to say that it only took a little while to get the hang of dry application. I'd recommend the FW masterclass books; they too are a really worthwhile investment and I've used a few of the techniques shown in them.

I hope you like how this has started, I know I do, and as always C & C welcome.
Next up is a 10 man breacher squad, then hopefully a 20 man tactical squad.

Bluddtoof

Thursday 29 December 2016

Dismember December .........By Bluddtoof

So I finally got my entry completed after a long period of having no mojo for painting. I'm pleased with the finished model and love the palette I went with. Oddly enough it's very similar to my Imperial Knight! I only realised as I was nearing completion. I obviously have an attraction to cream and red.
So here's some pics.....


Hope you like it, c & c welcome and I look forward to seeing the other entries.

Bluddtoof

Friday 28 October 2016

Arming for the Cypra Incident - 19th Dicers Armoured Column - Completed (Hobby Season Completions)

Hi All,

As promised here I am back with a mass of completed hobby season goodness.  This work has all been completed so close together that I feel rather hobbied out!  So this takes me to a ready to go position for our next Cypra Incident game "Running the Gorklet".

So no apologies this is going to be picture heavy and I feel very proud of the work I have achieved on this army this year.  This campaign has really helped me motivated me to get a new army on the table.  Anyway self congratulating back slapping out the way what have you painted Doc?

 WIP Tanks

 First off just wanted to show a couple of work in progress shots to give you all an idea of the pre shading I completed on the tanks using the airbrush.  I love this technique and the time it saves.


Thursday 15 September 2016

Showcase - Death Guard Legion Tactical Squad in Mk3 Armour


Hi All,

Ok so those who follow the blog will know I have been really toying with Heresy Death Guard for quite a long time.  Something along the lines of two years.  In that time since I started the project has changed significantly.  It started off as a 40k/30k army, the paint scheme was originally by hand and now the scheme involves a lot of airbrushing.  So yes its changed.

As part of the ever changing process and to come to a final decision I have now modified the bases as well.  I have been using the brown design for so long and on 4 other armies so I needed a change.  With this in mind the first thing I did was experiment a lot as illustrated by the pictures below:


These were all deemed failure in the end although I quite liked the high contrast red finish.  In the end I plumped for the base design you will see showcased on my first legion tactical squad below.

This tactical squad completes my first Hobby Season completion.   I am so happy with the finish and base contrast and hope this is the end of changing my mind and means I can push forward on getting units finished up.

So first project is complete:


As always comments are welcome.  If the interest is there I will be happy to describe my process for painting these dudes up.

Cheers

DOC

Tuesday 30 August 2016

Showcase; Imperial Knight Errant, Winter Effects Weathering

Hi All

Bluddtoof here, finally I've got round to finishing off the weathering on my Freeblade Knight Errant. It's only taken me 2 years!
So I was really quite nervous about this little project; the knight is probably my best work to date, I was very concerned I'd mess up the finish with poorly done weathering, I'm not experienced at all with weathering.
I'd done quite a bit of research on different methods and materials over the last year or so, a lot of advice came from my code40k colleagues, a big shout out to the boys for the help!
I bought a winter effects kit a while back that has quite good instructions included, Scene- A-Rama is the brand, and I experimented a bit with the various materials with mixed results.
The "snow base" liquid makes an excellent base layer for applying snow in the form of flock or powder, the snow powder in the kit is made of crystals of varying sizes all mixed up, I used it in conjunction with GW snow flock and Bicarb, applied in different layers for the final finish. This came after a great deal of playing around. Some of it I then coated in the "Ice Effects" liquid, a thickish clear resin that sets real quick.
All of this worked ok and was pretty easy after I'd worked out the method.
The tricky bit was Icicles, I knew I wanted the knight to be crusted with icicles hanging from the shoulder guards and carapace to simulate it having stood sentry for ages in sub zero temperatures and now just awoken to the call to arms. The kit has instructions to use the ice resin to make icicles...... it doesn't work, I tried and tried and tried, the resin just spreads and makes an icicle shaped flat sheet.... no good for the application I wanted..... so.... Luko Dakka delivered the solution with a quick explanation of how he used melted flying stems.....some practice later..... and Icicles I'm really pleased with! Hurrah! A word of warning tho if you try the melting plastic method...open a window and wear a face mask, nasty fumes.
In case you've not tried it here's my method I used....
Over a tea candle, hold a flying stem at both ends with a pair of needle nosed pliers in each hand. Hold the stem about 10-20mm above the flame, too close and it will scorch and even ignite...that was an interesting minute or so! Too high and you'll be waiting a LONG time. Keep a close eye on the surface of the plastic, it will start to develop fine striations and very shortly it will sag visibly.. Immediately apply a little tension and REMOVE from the heat, keep the gentle tension applied and the stem should quickly stretch very thin, keep pulling gently and the plastic should keep stretching with the thick end bits slowly feeding into the thin middle bit, you'll feel the resistance increase gradually, keep applying gentle tension until it won't stretch any more. You should now be able to let go and you'll have a long piece of plastic with a really thin middle section flaring out at both ends to fat bits. Chop this in the middle and cut/shape the fat ends to create the bit that connects to the surface the icicle will hang from, 2 icicles from 1 bit. You can then go on to do the same with the chopped of ends too if they're big enough.
This took me a few attempts to get right, it's very much a matter of FEEL with each piece, if you pull too fast it'll snap and then curl up.....ruined! Pull too little it'll just sag, too long over the heat...sag, burn, mess! Thankfully clear plastic flyer stems are cheap and plentiful, you generally get extras with any skimmer model.
One thing I did find tho was that once you've melted a piece and let it set again it doesn't melt cleanly ever again, I'm sure a chemist could explain it!

Anyhoo, enough blather! Piccies....


As you can see I haven't applied a huge amout of snow on it, I didn't want to obscure the paint job too much but I wanted it to look like it had recently had snow fall which has been dislodged as it starts to move.
Hope you like it, I do, I'm very pleased with the finish and I'm looking forward to rest of my Knights and trying different winter effects methods on them.
As ever C&C welcome....

Bluddtoof